How to walk again after Achilles rupture surgery
Recovering from Achilles rupture surgery takes time and patience. Here’s what you need to know to get back on your feet:
-
Timeline: Full recovery takes 6–12 months. Walking starts in phases:
- Weeks 1–2: No weight on the leg; focus on healing.
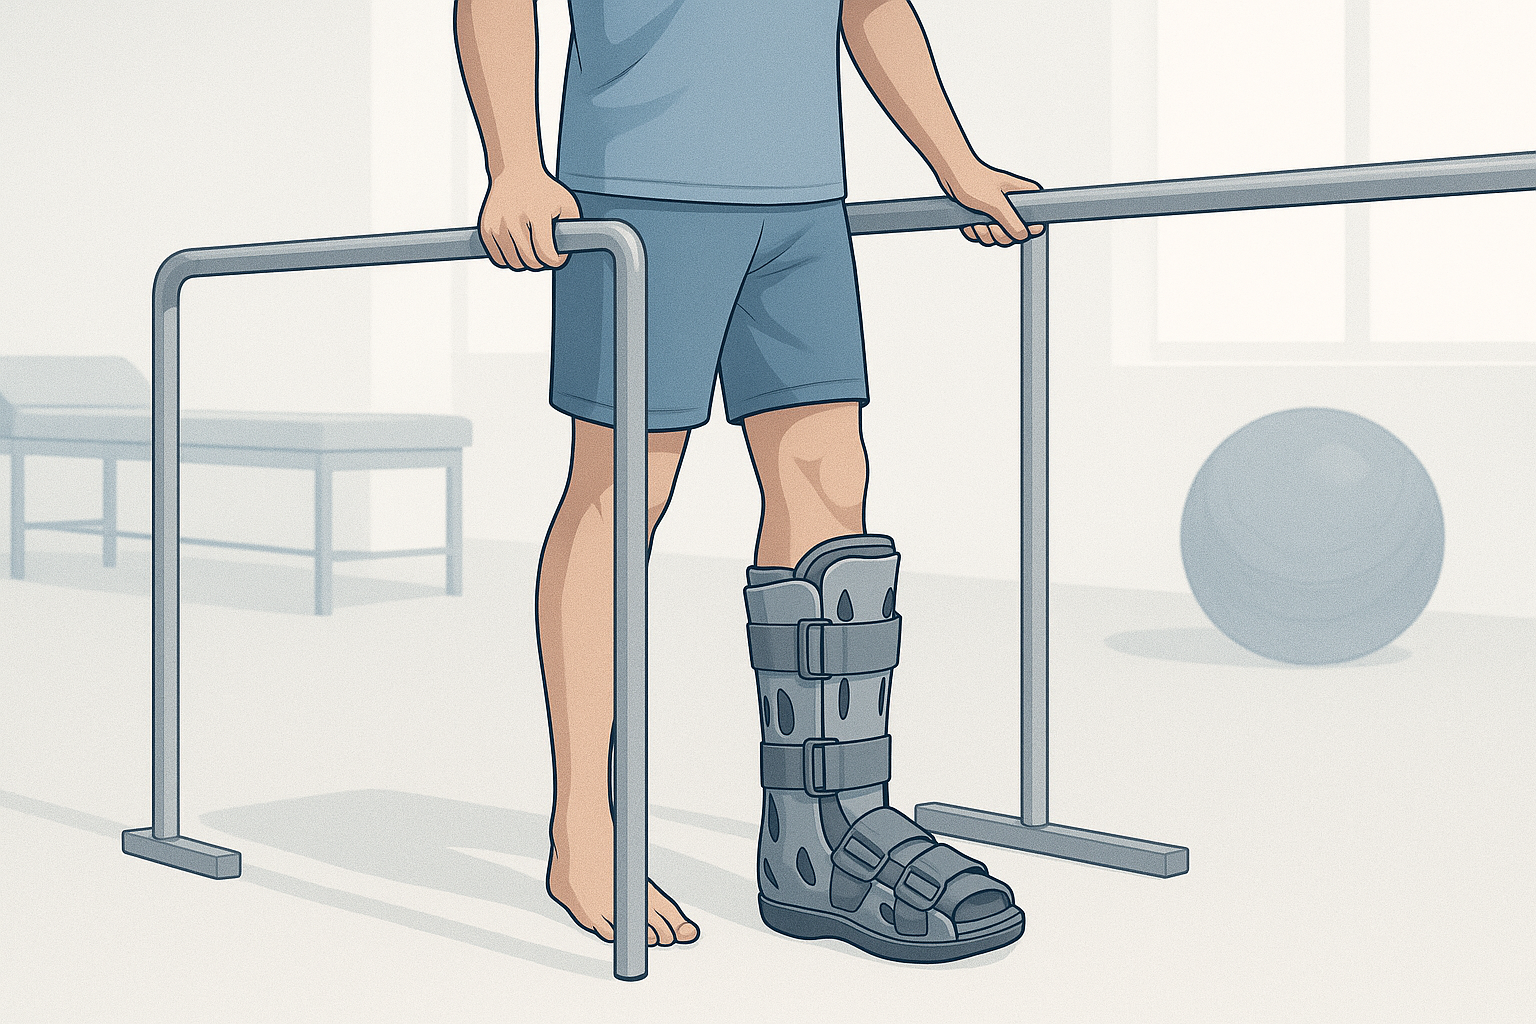
- Weeks 3–6: Gradual weight-bearing with a protective boot.
- Weeks 7–10: Learn to walk in the boot and transition to regular shoes.
- Weeks 10+: Walk independently and strengthen your Achilles.
-
Protective Gear:
-
Rehabilitation:
- Start physical therapy early (weeks 2–6) to regain strength and flexibility.
- Exercises include isometric ankle presses, heel raises, and balance training.
- Avoid rushing; overloading the tendon can cause setbacks.
-
Pain and Swelling:
- Keep your leg elevated and use ice during the first few days.
- Take prescribed pain medications or over-the-counter options like ibuprofen.
-
Transitioning to Normal Walking:
- By week 10, switch to supportive shoes with a slight heel lift.
- Focus on proper gait mechanics: heel-to-toe motion and even weight distribution.
Quick Overview:
| Phase | Duration | Key Activities |
|---|---|---|
| Phase 1 | Weeks 1–2 | No weight, use crutches, manage swelling |
| Phase 2 | Weeks 3–6 | Gradual weight-bearing, start therapy |
| Phase 3 | Weeks 7–10 | Walk in boot, reduce heel lifts |
| Phase 4 | Week 10+ | Transition to regular shoes, strengthen |
Key Tip: Follow your surgeon’s advice and listen to your body. Recovery is a step-by-step process - don’t rush it!
Achilles injury recovery: walking techniques with aircast boot
Phase 1: First 2 Weeks After Surgery
The first two weeks following Achilles rupture surgery are crucial for giving your tendon the best chance to heal before introducing weight-bearing activities. During this time, it’s essential to carefully follow your surgeon’s instructions.
No Weight on the Affected Leg
Avoid putting any weight on your surgical leg during this period. Typically, this involves touchdown weight-bearing (TDWB), where your foot lightly touches the ground while using crutches for support. Make sure your crutches are properly adjusted to your height for safe use. To make things easier at home, set up a comfortable spot - preferably on the main floor - with your leg elevated. Keep essentials like water, medications, and books or devices within easy reach to minimize movement.
Wearing Protective Boots and Splints
After surgery, your foot will likely be placed in a plaster cast or a half-cast (backslab) to keep it in the correct position [6]. This cast holds your ankle in a plantarflexed position (toes pointing downward at a 20–30 degree angle), which helps reduce tension on the healing tendon [3].
After the initial cast, you’ll transition to a walking boot. Two common options are:
- Vacoped Boot: Costs around $350 and provides excellent ankle positioning with a pressure-free bead liner.
- Aircast Boot: Costs approximately $225 (including wedges) and is widely available, though its ankle support is less refined.
| Boot Type | Cost | Comfort Level | Ankle Positioning | Availability |
|---|---|---|---|---|
| Vacoped | $400 | Excellent | Superior equinus | Limited |
| Aircast | $225 | Good | Adequate | Widespread |
For nighttime, an Achilles Tendon Rupture Night Splint (about $89.99) can help maintain proper foot alignment while you sleep. However, avoid walking or standing while wearing the night splint, and wait at least two weeks post-surgery before using one to ensure your wound has started healing [7][8].
Controlling Pain and Swelling
Managing pain and swelling is key to a smooth recovery. Keep your leg elevated above your heart using pillows or a recliner - propping it on a coffee table won’t be enough to reduce swelling effectively [4].
During the first 3–4 days, icing is especially important. Apply ice for 30 minutes on and 30 minutes off, always using a towel as a barrier to protect your skin [4][5].
Your surgeon will likely prescribe pain medications, which may include narcotics and anti-inflammatory drugs. Take these exactly as instructed. If you don’t have any conditions like kidney or stomach issues, over-the-counter options such as ibuprofen or Aleve can also help with pain and swelling [4][5].
Keep the surgical site clean and dry at all times [3]. Use a waterproof cover when showering to prevent water from reaching the cast or boot. If you notice increased redness, warmth, or unusual drainage, contact your surgeon immediately, as these could be signs of infection.
Pain medications can sometimes cause constipation, so increase your fiber intake and drink plenty of water to counteract this side effect [5].
Phase 2: Weeks 3-6 - Starting to Bear Weight
Between weeks 3 and 6, you’ll move from protecting your healing tendon to gradually placing weight on your surgical leg. This phase marks a major step in your recovery, so it’s essential to pay attention to your body and stick to your surgeon’s advice. This period bridges the initial tendon protection phase with the start of active rehabilitation.
Gradual Weight-Bearing Steps
Around week 3, you can begin partial weight-bearing (PWB) at up to 50% of your body weight while wearing your protective boot [9]. For instance, if you weigh 180 pounds, that’s about 90 pounds of weight.
In weeks 3–4, focus on toe-touchdown weight-bearing with crutches, allowing only light ground contact [3]. As you progress into weeks 4–6, you can increase weight-bearing as tolerated, still using both your boot and crutches [3]. By week 5, many people are able to achieve full weight-bearing (FWB) while continuing to wear the boot [9]. Expect some mild discomfort and swelling as your body adjusts to the increased load - this is normal [10].
Physical therapy typically begins during this phase, with sessions scheduled one to two times per week between weeks 2 and 6 [3]. These early rehab exercises set the foundation for more active recovery in the weeks ahead.
Adjusting Your Boot with Heel Lifts
As you increase weight-bearing, adjusting your boot is crucial for maintaining proper alignment and safety. During weeks 3–6, the boot is gradually adjusted to bring your ankle closer to its normal position. At 3 weeks post-surgery, the boot is usually set at 30 degrees of plantar flexion, reducing by 10 degrees each week [9].
| Week | Boot Angle | Weight-Bearing Status | Key Changes |
|---|---|---|---|
| Weeks 2–3 | 20° plantarflexion | Touchdown with crutches | Initial boot positioning |
| Weeks 3–4 | 10° plantarflexion | Touchdown with crutches | Reduced angle |
| Weeks 4–6 | Neutral with heel lifts | Weight-bearing as tolerated | Near-normal positioning |
By weeks 4–6, if you’re comfortable reaching neutral plantarflexion/dorsiflexion, you can transition to a neutral boot with small heel lifts [3]. Keep your boot on 24 hours a day during the early part of this phase. Remove the sole overnight, but make sure to put the boot back on each morning [9]. By week 6, some patients may be able to sleep without the boot, depending on individual progress [9].
Basic Strengthening Exercises
To maintain muscle strength, introduce controlled exercises like isometrics, resistance band work, and seated heel raises. Perform 2–3 sets of 10–25 repetitions or 15–45 second holds, depending on your tolerance. Always move slowly and stop immediately if you experience pain or swelling near the Achilles tendon [12].
- Isometric ankle exercises: With your boot on, press the ball of your foot into the ground at a manageable effort. Aim for 2–3 sets of 15–45 second holds, 1–3 times daily [11].
- Resistance band exercises: Use a light resistance band around the ball of your foot for ankle plantar flexion exercises, avoiding dorsiflexion. Perform 2–3 sets of 10–25 repetitions, 1–3 times daily [11].
- Seated heel raises: Work on calf strength by lifting your heel as high as possible and squeezing your calf muscles at the top. Start with your heel elevated on a wedge to limit dorsiflexion, aiming for 2–3 sets of 10–25 repetitions, 1–3 times daily [11].
Additional exercises, such as towel curls and the short foot exercise, can help minimize muscle atrophy [11]. Once you’re cleared for full weight-bearing, you can also add lower-body exercises like leg extensions, hamstring curls, and modified squats (e.g., squats to a box) while keeping your boot on [11].
“Exercise gets things moving. Plus, exercise puts you in control and can have the long-term benefit of preventing future problems with your Achilles tendon.”
- Brett Sears, PT [12]
Single-leg balance exercises can also help rebuild proprioception. Start by standing on your uninjured leg on a flat surface, aiming for 3 sets of 60 seconds. Use your hands for support if needed, and gradually build confidence and strength [11].
sbb-itb-2ee8b8e
Phase 3: Weeks 7-10 - Learning to Walk in the Boot
Weeks 7 through 10 mark an important stage in your recovery journey. This is the time to focus on refining your walking technique while still using the boot, setting the stage for a smooth transition to regular footwear. The key here is to work on proper gait mechanics to avoid any setbacks.
How to Walk Properly in Your Boot
Walking correctly in your boot is essential for rebuilding strength and balance. The goal is to develop a natural walking pattern - starting with your heel, rolling through the foot, and pushing off with your toes [13]. To ensure even weight distribution, consider using a mirror to check your alignment and posture while practicing.
During this phase, the heel wedge in your boot is gradually reduced. By week 7, the wedge is typically lowered to about a quarter inch (0.5 cm) [13]. Since the boot adds height, it’s a good idea to use an Evenup shoe leveler and wear a running shoe with a thick sole on your uninjured foot to maintain proper alignment [13]. If stability is an issue, use a balance aid until you feel more secure [13].
Stopping Boot Use Gradually
Transitioning out of the boot requires careful planning. Between weeks 8 and 12, you may start wearing regular shoes fitted with a quarter-inch (0.5 cm) heel wedge [13]. When choosing shoes for this phase, look for ones with at least a 10 mm heel-to-toe drop to maintain the necessary heel lift [13]. Always follow your healthcare provider’s advice as you gradually reduce your reliance on the boot and heel lifts.
It’s normal to experience some discomfort or swelling as you progress [10]. However, if the pain or swelling becomes significant, it’s important to slow down and consult your healthcare provider before continuing.
Advanced Exercises for Strength and Movement
As your recovery advances, the focus shifts to improving your gait, strengthening your ankle’s plantar flexors, and gradually increasing ankle dorsiflexion [2]. Once you’re fully weight-bearing in the CAM boot, gait training in an athletic shoe with heel lifts can begin [2].
If you’re dealing with gait issues like a prolonged stance or a weak push-off, targeted exercises can help retrain those movements. Practicing the heel-to-toe walking motion is especially effective [2]. Other helpful options include aquatic therapy and unweighted treadmills, as these provide support while allowing for more natural movement [2].
Keep in mind that during the gait cycle, your Achilles tendon experiences loads of 2–4 times your body weight [2]. Pay close attention to any signs of stiffness, pain, or swelling, and adjust your activities accordingly. Understanding how to manage load progression and listening to your body are critical to avoiding overexertion.
This phase may also include advanced strengthening exercises aimed at enhancing balance and improving ankle function. Always work closely with your physical therapist when introducing more challenging activities. Monitoring your symptoms and following professional guidance will help ensure a safe and steady recovery.
Phase 4: Week 10 and Beyond - Walking Without Support
You’ve made it to the final stage of your walking recovery journey. At this point, you’ll leave behind protective boots and heel lifts as you work toward walking independently. While the timeline varies, many people reach this stage between weeks 10 and 12 after surgery. It’s also time to adjust your footwear and prepare for life beyond supportive boots.
Switching to Regular Shoes
The shift from boots to regular shoes is a gradual process. Around week 8, you’ll start with supportive footwear that includes a single gel heel pad. By week 10, you’ll begin reducing or removing heel lifts, depending on your comfort and progress.
When choosing your first regular shoes, look for ones with at least a 10 mm heel-to-toe drop. This slight elevation helps ease the transition and reduces strain on your recovering tendon. Running shoes or athletic footwear are excellent choices because they offer cushioning and support. Avoid entirely flat shoes at this stage, as they can put unnecessary pressure on your Achilles tendon.
Walking Normally Again
After weeks of modified walking, regaining a natural stride takes some effort. Your goal is to restore the heel-to-toe motion: landing on your heel, rolling through your foot, and pushing off with your toes. This may feel awkward at first, but deliberate practice will help.
Using a mirror can be a helpful tool. Watch your alignment and ensure both legs are bearing weight evenly. It’s common to develop a limp or favor your uninjured leg, so concentrate on taking balanced steps and spending equal time on each foot.
Start on flat surfaces and gradually try walking on different terrains, such as grass, gravel, or gentle slopes. These variations challenge your balance and build strength. Pay attention to your body - don’t push through significant pain or discomfort.
If a limp persists or push-off feels difficult, targeted exercises can make a difference. Practice the heel-to-toe motion slowly, focusing on proper mechanics rather than speed. Aquatic therapy can also be a great option, as water supports your body while allowing for more natural movement.
As your walking pattern improves, it’s time to focus on strengthening your Achilles and surrounding muscles.
Exercises to Keep Your Achilles Strong
To support your recovery, your exercise routine should aim to build strength, improve balance, and enhance coordination.
-
Standing Heel Raises: These are key to rebuilding calf strength. Start with equal weight on both legs, and as you get stronger, shift more weight to your recovering leg. Push through your first metatarsophalangeal (MTP) joint for proper muscle activation.
-
Seated Calf Raises: Use light resistance to build endurance in your calf muscles. Focus on controlled movements rather than heavy loads.
-
Balance Exercises: Simple activities like tandem stance or single-leg balance help retrain your proprioception - your sense of body position and movement. Begin with a wall for support and progress to balancing unassisted.
-
Eccentric Calf Drops: These exercises, where the muscle lengthens under tension, are especially effective for strengthening the tendon. Start slowly and increase repetitions as you gain confidence.
“Active stretches strengthen the tendon and calf while it lengthens them, whereas passive stretches only lengthen them.” [13] - Maryke Louw, Chartered Physiotherapist
Don’t forget the rest of your leg muscles. Strengthening your glutes, hamstrings, and quadriceps helps maintain proper walking mechanics and prevents injuries caused by overcompensation.
If you’re planning to return to sports, plyometric exercises like hops and jumps can be introduced later in your recovery. For now, prioritize mastering basic walking and strengthening exercises.
Low-impact activities such as stationary biking can help maintain your cardio fitness without straining your tendon. Swimming is another excellent option once your incision is fully healed and your doctor gives the green light for water activities.
Reaching the point where you can walk without support is a huge achievement, but recovery doesn’t stop here. Consistency with exercises, listening to your body, and staying in touch with your healthcare team will keep you on track toward full recovery.
Key Points for Walking Again After Achilles Surgery
Recovering from an Achilles rupture is a journey that requires patience and a well-structured plan. Research shows that complete recovery can take a year or longer [14], even though many rehabilitation programs aim for a return to sports around the six-month mark [1]. Knowing what to expect at each stage helps you stay focused and avoid potential setbacks.
Recovery moves through specific phases, starting with strict non-weight bearing, transitioning to gradual loading, then boot-assisted walking, and finally independent movement. The later stages - typically from week 13 to week 25 - emphasize building strength and increasing activity levels [1].
Wearing a boot for about 10 weeks is crucial for protecting the tendon and ensuring proper alignment. Skipping steps or rushing through the timeline can lead to complications like tendon elongation or even re-rupture. It’s worth noting that the most significant risk of tendon elongation occurs between 2 and 6 weeks after surgery [2].
A fully healed Achilles tendon is incredibly strong, capable of handling loads up to 11 times your body weight during high-speed running [2]. However, during recovery, it’s essential to respect certain restrictions. For instance, avoid dorsiflexion beyond neutral for the first 8 weeks and hold off on passive calf stretching until at least 12 weeks post-surgery to safeguard the repair [2].
Your recovery timeline will depend on factors like your age, overall health, and the severity of your injury [1]. While these timelines provide a general guide, the most important thing is to monitor your symptoms and progression closely. Avoid rushing through the phases, trust the process, and remain consistent with your exercises. Every small step forward brings you closer to walking independently again.